The Witcher 3 has a number of graphical settings that will impact that game’s appearance and affect performance.
In the Options menu, the game options that will affect game performance are found under “Postprocessing” and “Graphics”. The other menus, “HUD Configuration” and “Rescale HUD,” simply affect how the Heads-Up Display appears in the game, which does not impact performance to any significant degree.
Postprocessing Settings
Postprocessing Presets
Everything under the “Postprocessing” menu is nicely organized under presets, as well as individual settings. So, what is postprocessing? The scene and 3D objects are first rendered in the memory of the GPU. Then pixel shaders are applied to the rendered scene, which creates filters and effects.
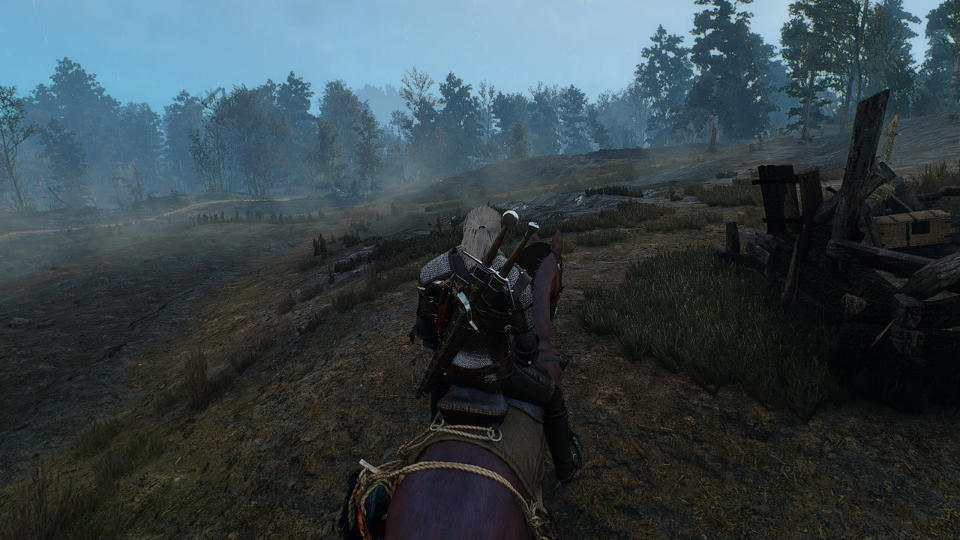
In short, it makes your game look prettier, but rather than doing so by increasing texture quality, it adds nice graphical effects. There are three preset settings here: “Low”, “Medium”, and “High”. Increasing this setting from low to medium impacts performance by roughly 12%, while changing it from low to high impacts it by roughly 15%.
Drag the cursor to compare Postprocessing Preset on Low and Medium.
Drag the cursor to compare Postprocessing Preset on Medium and High.
Motion Blur
This setting causes blurring when a character is moving at a high velocity. For example, if Geralt is riding very quickly on his horse, then the screen will blur slightly to accentuate the speed. The same goes for fast-moving enemies and other characters within the game. This setting has a relatively small impact on performance, and is generally turned on or off due to personal preference more than anything else.
Blur
This setting has a similar impact to motion blur, however in different places. It introduces Gaussian blur, which is a general screen blur that reduces detail and makes objects look softer. Additionally, radial blur is introduced, which is generally used to accentuate speed. This setting also has a minimal frame rate impact, and is general turned on or off due to personal preference more than anything else.
Anti-aliasing
CD Projekt RED created their own form of anti-aliasing for The Witcher 3, as the more common types weren’t compatible with the game's engine. This AA helps to reduce jagged edges and the shimmering sometimes present on edges when the player is moving. This setting has a differing impact depending on location, with the frame rate changing anywhere from 2% to 10%.
Bloom
Bloom is a setting that affects bright lights within the game. It generally improves their appearance, as well as the improving the lighting on surfaces cast with bright light. Having this enabled generally makes lighting less flat than it otherwise would appear. It doesn’t have a huge frame rate impact—roughly 4% based on our testing.
Drag the cursor to compare Bloom Off and On.
Sharpening
This setting generally makes images appear crisper than they otherwise would. It does this by making edges more defined, and often darker. Though it can look gorgeous in places, it may also look less realistic in others. This setting also has a minimal frame rate impact, with one frame per second being the most lost by turning setting this to “High”.
Drag the cursor to compare Sharpening Off and on Low.
Drag the cursor to compare Sharpening on Low and High.
Ambient Occlusion
Ambient Occlusion is an effect which adds shadows at locations where two objects meet. It also affects shadows wherein one object is blocking light from hitting another. Turning this setting up makes the game look much more realistic. This setting has a relatively small impact, as turning if from “None” to “SSAO” causes only a 4% FPS impact, while turning it to “HBAO+” causes about a 6% FPS hit, though this can increase, depending on your location within the game.
Drag the cursor to compare Ambient Occulsion on None and SSAO.
Drag the cursor to compare Ambient Occulsion on None and HBAO+.
Depth of Field
This setting adds a subtle blurring effect to distant models. This can help to hide lower-detail terrain and the like. It has minimal frame rate impact, and can be turned on or off based on how much you like the effect.
This setting has no perceptible impact on FPS.
Drag the cursor to compare Depth of Field Off and On.
Chromatic Aberration
Chromatic Aberration is an effect typically associated with cheaper cameras. It slightly distorts the image to look more like a photograph. This effect has minimal frame rate impact, and can be turned on or off depending on whether you like the effect.
Drag the cursor to compare Chromatic Aberration Off and On.
Vignetting
This effect slightly darkens the corner of the screen. It has no performance impact, so it can be turned on if you like the effect.
Drag the cursor to compare Vignetting Off and On.
Light Shafts
Commonly referred to as God Rays, light shafts are beams of light that are seen through foliage, windows in otherwise dark rooms, and are generally seen through gaps in models and around the edges of objects. The frame rate impact is relatively minimal, and they look nice.
Drag the cursor to compare Light Shafts Off and On.
Graphics Settings
Graphics Presets
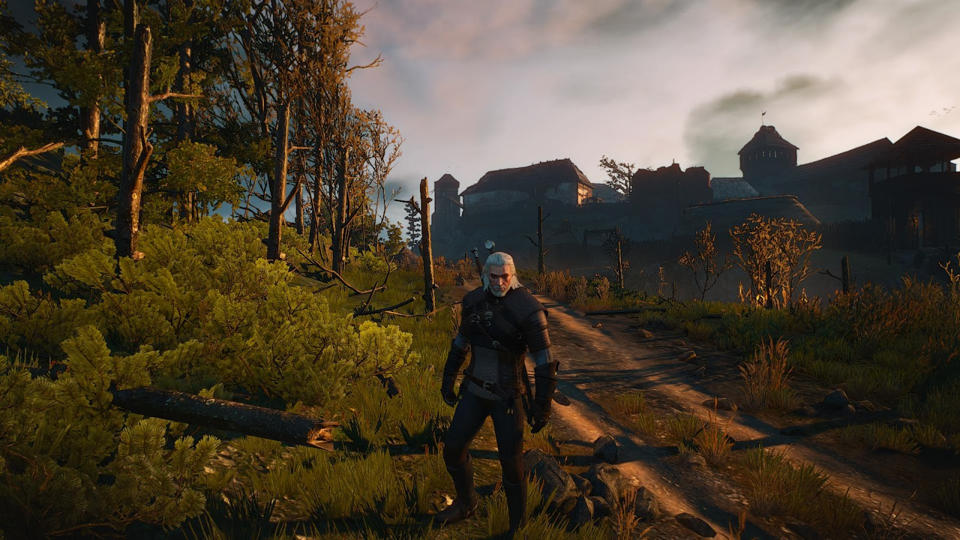
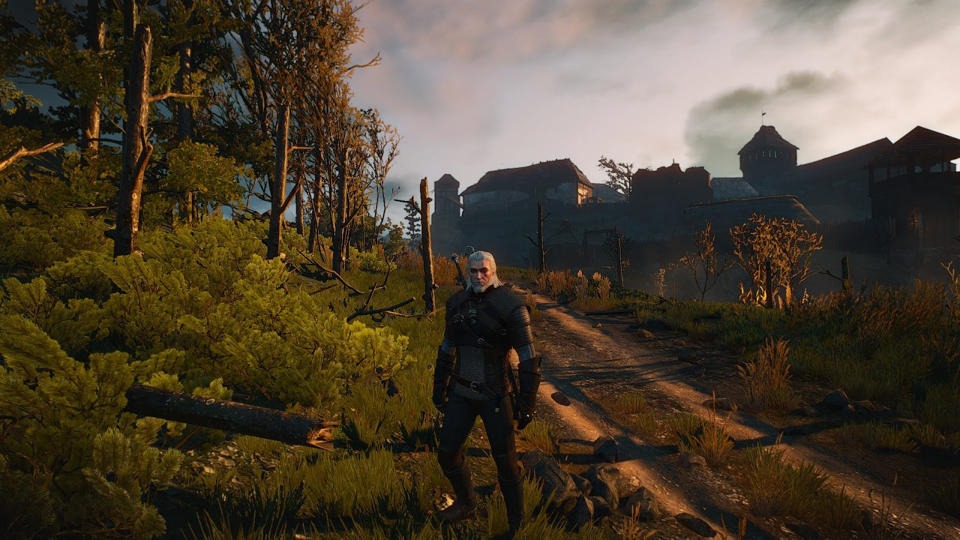
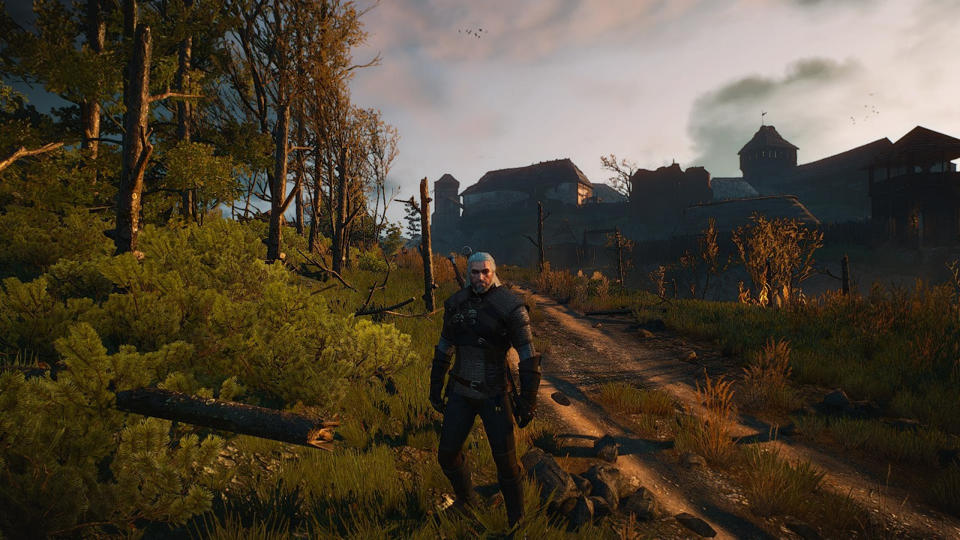
Like post processing, the graphics sections are also organized neatly into presets. These have the most impact on performance, and likewise can greatly increase or decrease visual fidelity. These presets include “Low”, “Medium”, “High”, and “Ultra.” Increasing the preset from Low to Medium causes about a 12% impact on performance, while changing it from Low to High causes a ~40% impact, and changing it from Low to Ultra causes a ~55% impact.
Drag the cursor to compare Graphics Preset on Low and Medium.
Drag the cursor to compare Graphics Preset on Medium and High.
Drag the cursor to compare Graphics Preset on High and Ultra.
VSync
VSync, short for “Vertical Synchronization,” synchronizes your in-game frame rate with your monitor’s refresh rate. So, for example, if you have a 60 Hz monitor, your game will always try and render at that frame rate (60 FPS in this instance), even if it could possibly go higher. This is meant to reduce screen tearing, which is when the top and bottom of the screen are showing slightly different images. It’s good to turn on vsync if your frame rate stays above 60 (or whatever your refresh rate is) all the time, otherwise leave it off.
Maximum Frames Per Second
This settings caps your framerate so that your GPU doesn’t do unnecessary work. For example, if you have a 60Hz monitor but you can run the game at 70 FPS, then your monitor is rendering an extra 10 FPS. This could cause it to heat up and work harder than it needs to. Therefore, it is recommended that you set this to the refresh rate of your monitor. This setting contains options for frame rates such as 30 FPS, 60, and unlimited.
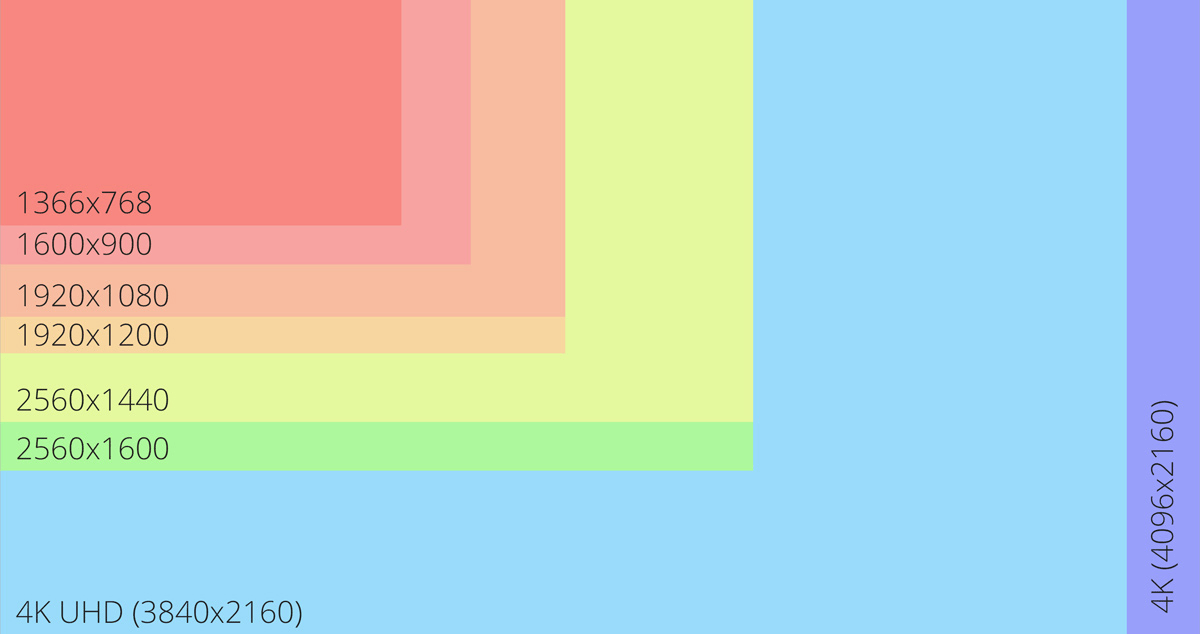
Resolution
The Resolution sets the screen resolution at which the game will be rendered. You can turn this down to be less than your monitor’s resolution if you want a performance gain. For example, turning the setting down to 1024x768 from 1920x1080 will give a large performance increase. This setting contains a slider that has multiple resolution options, depending on your monitor’s native resolution.
Display Mode
This setting affects how the game will be displayed. Options include windowed, borderless windowed, and fill screen. This has no performance impact unless you have other stuff running in the background.
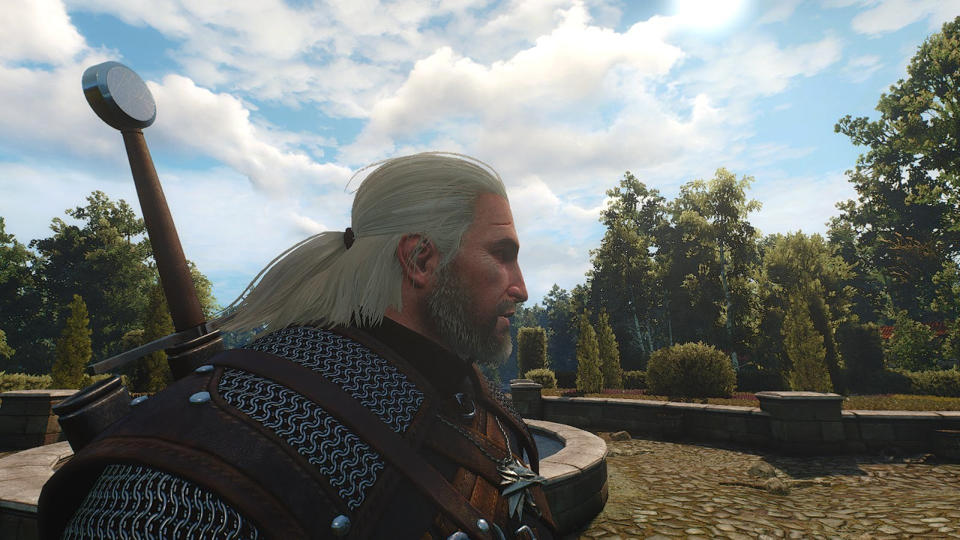
Nvidia HairWorks
This Nvidia-specific effect adds thousands of tessellated hair strands to characters, each of which behaving (at least theoretically) like actual hair would. It allows for individual shadowing and effects to be added to the hair, further adding to the realism. The slider for this option has three possible selections: Off, Geralt, and On. The frame rates vary heavily based on location, so for our testing we focussed on Geralt on horseback, so that there would be multiple subjects for the effect. Turning it from “Off” to “Geralt” causes about a 14% drop in FPS here, and and changing it from “Off” to “On” causes a 20% drop. Once again, this varies greatly depending on the situation.
NVIDIA HairWorks AA
This setting affects anti-aliasing applied to HairWorks strands. It makes the strands appear smoother, in general, but isn’t particularly noticeable in most instances. For our testing, we did a close up on Geralt’s head. As such, there will be more anti-aliasing to do, and the performance impact is likely greater than is the case when the camera is more zoomed out. There is a slider with multiple options: 0, 2, 4, and 8. Turning it from 0 to 2 will cause about a 7% drop, from 0 to 4 a 14% drop, and from 0 to 8 a 18% drop.
Drag the cursor to compare HairWorks AA on 0 and 8.
HairWorks Preset
This affects the degree to which NVIDIA HairWorks effects are implemented, and the effects on said strands. It has two settings: Low and High. Turning it from Low to High causes about a 21% drop in our testing, with Geralt’s head close to the camera.
Drag the cursor to compare HairWorks AA Preset on Low and High.
Number of Background Characters
This limits the number of NPCs that can be simultaneously rendered on the screen. The Low setting caps NPCs at 75, Medium at 100, High at 130, and Ultra at 150. During our play time, we have not been able to find a location where 75 NPCs are being rendered, let alone 150, so we are unable to demonstrate and display the impact of this setting.
Shadow Quality
Shadow Quality has many shadow-affecting settings wrapped up into it. As such, this setting affects the resolution of the shadows, the visibility of shadow details at different distances, and many more. It has a large visual impact, and is definitely worth turning on if you are going for a realistic game. This setting has four options: Low, Medium, High, and Ultra. Turning it from Low to Medium decreases FPS by a minimal amount, Low to High decreases it by 4%, and Low to Ultra decreases it by 7%. This setting, as with many others, has a varying impact, depending on location.
Drag the cursor to compare Shadow Quality on Low and Ultra.
Terrain Quality
This setting should increase the detail of the terrain viewed within the game. It has a minimal impact on FPS. Turning it from Low to Medium, High, or Ultra, there is in impact of only roughly 4%.
Drag the cursor to compare Terrain Quality on Low and Ultra.
Water Quality
This setting increases the general quality of water. Though it is noticeable in most bodies of water throughout the game, it has the biggest effect on those which are affected heavily by wind. Turning this from Low to Medium causes about a 2% FPS hit, from Low to High causes about a 4% hit, and from Low to Ultra causes about a 8% hit.
Drag the cursor to compare Water Quality on Low and Ultra.
Grass Density
This setting affects the amount of grass that will be seen on the ground. Even on the highest setting, there isn’t that big of a difference to be seen. The impact is small, and turning the setting from Low to Medium causes a negligible frame rate impact, from Low to High causes about a 3% hit, and from Low to Ultra causes about a 5% impact.
Drag the cursor to compare Grass Density on Low and Ultra.
Texture Quality
As the title entails, increasing this setting will generally increase the quality of the textures found within the game. While the resolutions of the textures themselves increase when first turning up the setting, the difference between High and Ultra is simply an increase in the memory allocated for texture quality. This means that there will be less pop-in, but not an increase in overall quality. As long as your graphics card has enough VRAM, Texture Quality has a minimal effect on frame-rate. 2GB should be enough VRAM to turn Texture Quality up to ultra, 1GB for lower resolutions with AA off.
Drag the cursor to compare Texture Quality on Low and Ultra.
Foliage Visibility Range
This setting affects the number and detail level of trees rendered within the game. Increasing it one setting doubles the number of trees that are able to be rendered. Additionally, it increases the rendering distance of trees, along with grass and bushes. Increasing this setting from Low to Medium causes about a 4% decrease in FPS, from Low to Medium a 5% decrease, and from Low to Medium a 13% increase.
Drag the cursor to compare Foliage Visibility Range on Low and Ultra.
Detail Level
This setting affects the visibility of decals generated during combat, such as blood splatter. In all instances, increasing this setting caused a minimal FPS hit on our test system.
Hardware Cursor
Turning this setting on means that the game will use raw input from your mouse, and could correct any issues you have with the cursor. This setting should only be turned on if you prefer the effect.